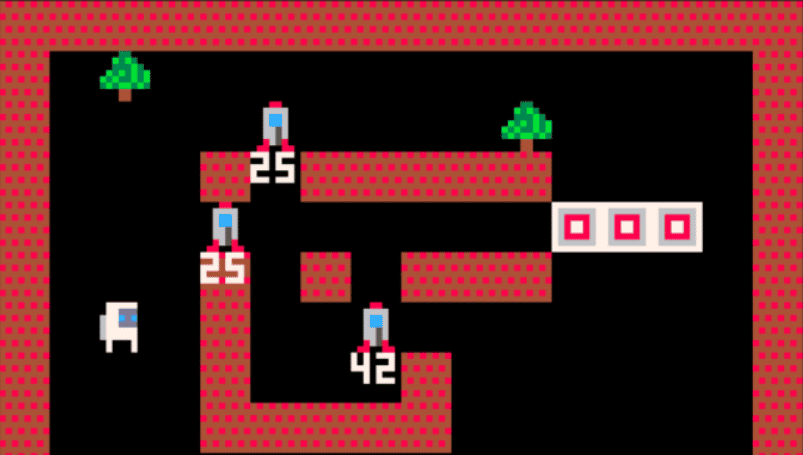
For the past few years I've seen a lot youtube videos talking about the concepts of Game Jams and building tiny games under a strict time constraint. As someone whos played video games since I was a child I've always wanted to try to build one myself. For once I saw ahead of time that the 2026 GMTK game jam was coming up soon and I decided to join in for fun and see what I could get done in such a short timeframe. This was the first game I've ever made and decided to use the Pico 8 fantasy console for development as it comes with all the tools needed for coding, graphics, and music within a single application. I had played around a little with Pico 8 for an hour or two but never got very far. Just enough to know how to move sprites around when input is detected so this was a great chance to learn more.
The theme of this years Game Jam was "Count Down" . I gave myself the evening to try come up with any concepts I could think of that could realistically be built within my current knowledge. Some of these included racing style games with a race to a finish line before time runs out, a Mr. Driller style rhythm game where you dig downwards to a specific beat, and what ended up being the final concept, a sokoban style game where you need to move a group of rockets to their launchpads in time for their launch.
Game Logic
This was the area I was most comfortable with coming from a web development background but it still had plenty of challenges to overcome. The first major hurdle to overcome was simply using the Pico 8 editor. You are severly limited in screen real estate when typing as all code is written within the Pico 8 application itself. This means using long variable and function names quickly causes you to need to scroll horizontally. To get around this you need to switch to short variable name, even single characters, and use comments when they are initialized to keep note of everything. There are some hacks to use external editors but I felt part of the fun and challenge was to stick to the built in editor.
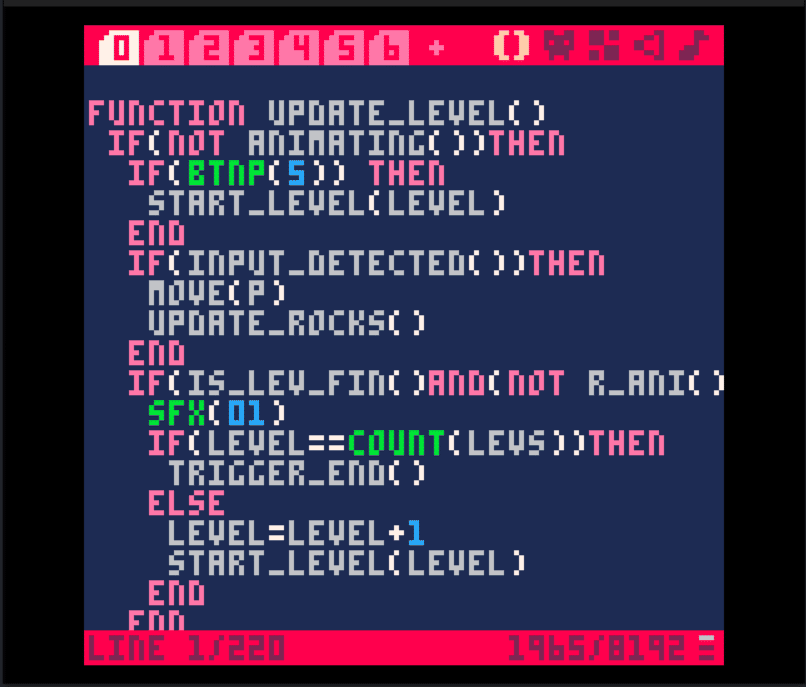
When it comes to actually coding the game loop Pico 8 offers built in functions called _draw() and _update() which handle the drawing of sprites and the games underlying logic respectively. Each function is called once per frame although if the system is under heavy load it is possible for the draw() to skip a frame of drawing the graphics to avoid any slowdown. There is also an init() function we can take advantage of to call our start level function the first time the game loads.
The Update Loop
I wont go crazy into detail here as this page wouild get very long but we initially set up a set of variables to handle tracking the current status of the player and the state of the game.
- Player for tracking the players current position
- Levels to store all information about the level. This includes the map coordinates and the positions of the rockets and launchpads.
- Current_Level to track what level we are on and allow us the level from the levels array
- Rockets which is set to an empty array initially but will be set when launching each level
- Launchpads which is handled the same as rockets
With these defined we then start each level by instantiating the rockets and launchpads to the required positions and setting the timers as needed. Since the update function is called every frame, which is 30 frames per second by default, the vast majority of our game logic will only actually need to be run when a player triggers an input in the game.
There is a built in btnp() function we can use to determine each of the possible inputs a player can make in the game. Our player can make five different types of inputs. They can move left, right, up, down, and press the X key/button to retry the current level they are on. Handling the retry is fairly simple as we can just call our start level function again without updating the current level variable.
For the movement options there was a few things that needed to happen
- If a player presses right we would need to update their position by increasing the players X coordinate by 8 (player.x = player.x+8)
- But if the players new position cannot be moved to, the next tile is a wall or its a rocket that cannot be moved, then we need to not update their position
- If the player tries to move to a tile that contains a rocket we then need to push the rocket in the same direction
- But, once again, if the rocket cannot move to the next tile we need to cancel the movement of both the rocket and the player
My original plan was to allow the player to only push one rocket at a time. If they tried to push two rockets that were next to each other their movement would be blocked even if there was space on the opposite side. While developing I realised that it would be much easier to have a single move function that could be called recusively that any object, whether the player or a rocket, could be passed to. This move function would then return either true or false depending on if the object could move to the next tile or not.
//o=object
function move(o)
 local newx = o.x
 local newy = o.y

    if(btnp(0)) then
     newx = o.x - 8
     p.dir = true
    elseif(btnp(1)) then
        newx = o.x + 8
        p.dir = false
    elseif(btnp(2)) then
     newy = o.y - 8
    elseif(btnp(3)) then
        newy = o.y + 8
    end

    if(will_push(newx,newy)>0) then
        local nr=will_push(newx,newy)
        local moved=move(rocks[nr])
        if(not moved) then
            return false
        end
    end

    if(can_move(newx, newy)) then
        o.x=newx
        o.y=newy
        //o.drawx=newx
        //o.drawy=newy

        return true
    end

    return false
end
With the push mechanic defined mostly through this function, it became much quicker to build start building levels and it was funny how much of the level design was based around the mechanic of pushing multiple rockets which was only done as a way to reduce scope and stay on the required timeline.
Once movement was checked and handled for each frame the code would next check what needed to be updated within the level. After a successful input each of the following needed to be checked and handled.
- Is a rocket now positioned on a launchpad and should play the launch animation
- Decrease the current timer on any rockets that have not reached a launchpad
- Are there any rocket's timers that have reached zero and should explode and trigger the end of level state
- Are all rockets launched and we trigger the win state and move to the next level
You can check out some of the code below to see how each of these was implemented
function update_rocks()
    for r in all(rocks) do
        if(r.state ~= 1) then
            if(is_rock_on_lp(r)) then
                r.state=1
                //r.x=-16
                r.y=-16
                sfx(02)
            else
                r.timer = r.timer - 1
                if(r.timer<0)then
                    r.state=2
                    sfx(03)
                end
            end
        end
    end
end
function is_lev_fin()
    for r in all(rocks) do
        if(r.state ~= 1) then
            return false
        end
    end
    return true
end

function is_game_over()
    for r in all(rocks) do
        if(r.state == 2) then
            return true
        end
    end
    return false
end
Art and Sprites
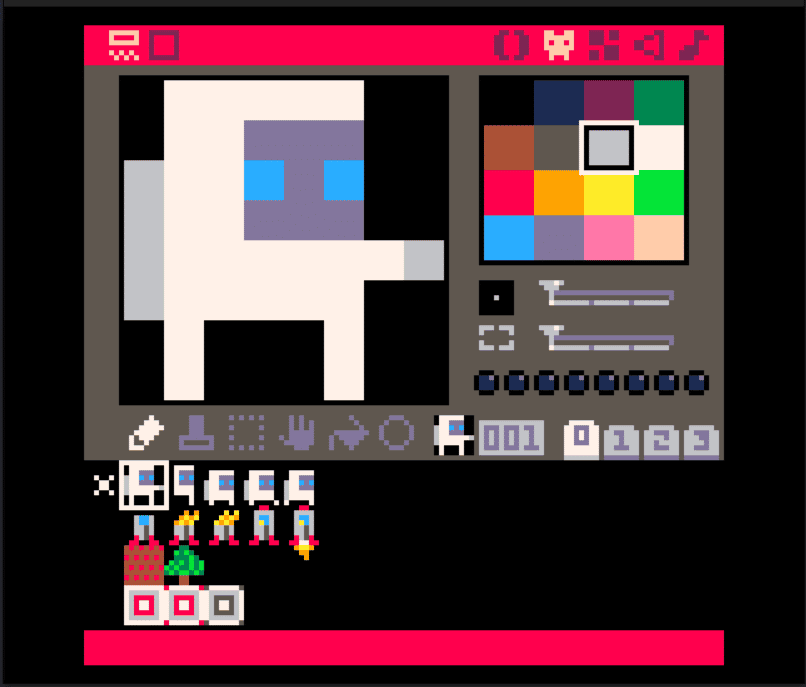
There may be a better way of handling both but making changes was difficult to picture as sprites are not always positioned next to each other on the sprite sheet if you don't plan well enough ahead.
For example, I started throwing together the splash screen by building an image of a rocket out of multiple sprites. The extra bits like the red legs to support it and the top where made of multiple different sprites. Part of the way through I realized it looked too wide and wanted to make it thinner. Shrinking it down meant I had to edit every sprite used to adjust them to the new width.
This happened again when I added a little light and shadow to try make it look less static. I had to create new sprites for each sprite that was affected and adjust current sprites just to make it look somewhat reasonable.
The Draw Loop
For animations I mostly stuck to 2 frame animations to keep things simple. I once watched a video about Super Mario 64 that showed they kept a constant random number generated to handle enemy animations. To emulate this concept I created a variable to track the current frame number up to 30. If we want to change an animation every second we can then just check if the number is 0. Two frame animations can easily be toggled by checking if the number is greater than 15 which will have them animate twice a second.
For more complex animations I needed to add a step variable to the object to keep track of what phase of the animation it is on. The only animation I had like this was the players walk cycle when moving between tiles. I added a step variable to the player object and incremented it every time the frame number was evenly divided by 10 (frame number % 10 == 0).
Music and Sound Effects
I expected music would be a big challenge as I have zero experience composing music of any type. But I have been trying on and off over the last few years to learn piano by myself at home which I hoped would give me an advantage and in some ways it did. To create the music I went over to the keyboard in my home office and started to play around with some basic melodies.
Composition
To keep the music as simple as possible, every note used fell withing the C major scale for the main music loop (although I threw in a short F major tune for the title screen once I got a little more comfortable and had time at the end of the jam). Rolling up the basic triads of the scale produced a short looping melody that worked well enough for the game and helped the experience feel less empty. For the bass line I just kept it simple using CFAG notes at the start of each bar (Which are the chords for The Beatles Let it Be which is one of the few songs I can play on the piano).
Using the Pico 8 music editor
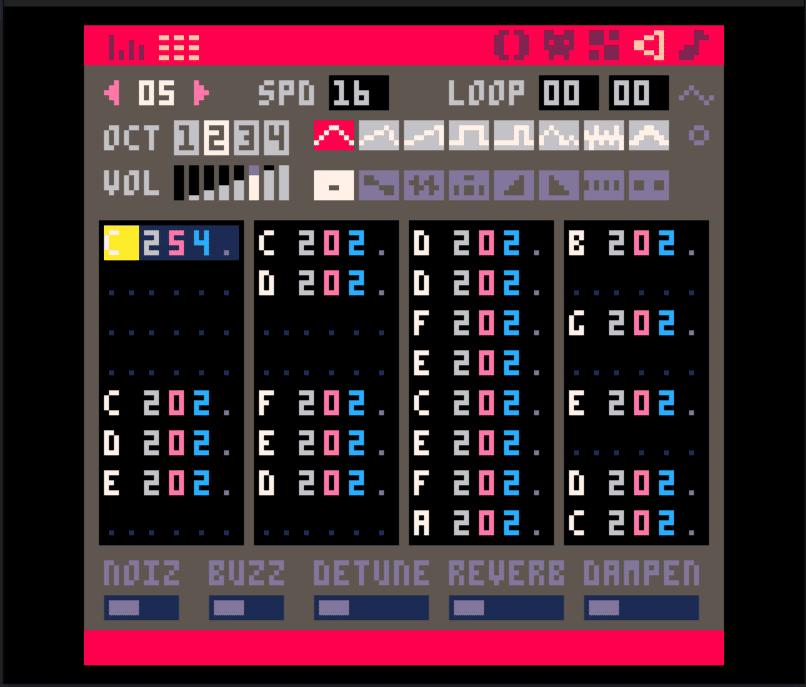
To convert these notes into music for the game I needed to get familiar to the sound effect and music tools within Pico 8. To build music we can choose up to 4 channels of audio to play at once. Each audio track is defined within the sound effects editor. Since there is both a bassline and a melody I needed to create two separate effects tracks and then play them at the same time as one final music track. This makes it difficult to hear the full version at once and if you want to tweak something small in the music you have to jump between editors.
The sound effects editor offers two different views. One allows you to create sound effects and alter the pitch by clicking with the mouse and the other allows you to use your keyboard as makeshift piano to input the notes. I found it much easier to use the keyboard to input the notes and use the surrounding buttons and instruments selections tools to change the octave and feel of the music.
I do feel that the sound editors are by far the most confusing for newcomers and are not very natural with all the switching between screens but if you get the hang of it there is a huge amount that can be done with it.